|
|
|
Categories
|
|
Information
|
|
Featured Product
|
|
|
 |
|
|
There are currently no product reviews.
 ;
The manual is complete with excellent quality! One suggestion, show number of pages and weather it is multi-lingual. The AD 600 Manuel is about 76 pages and over half is non English. This results in a larger print job than usually needed. Having this information, one could select the desired pages for printing.
 ;
I've been looking for a copy of the original user/owner manual. Just what the doctor ordered, thank you.
;
the manual was very helpful thank you very much no one else was able to help me thanx
;
This is an excellent handbook. We had no information on the appliance until we obtained this and are now able to use the appliance to its full potential. Strongly recommended.
;
Very happy to find this from owners-manual.com and the enclosed spec sheet as well.
Not longer available from Sony.
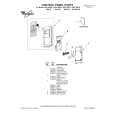
5. Separate parts A, B, C, D as shown in the figure.
A
B
8. Open the appliance door and the furniture door at 90¡. Insert the small square (B) into guide (A). Put together the appliance door and the furniture door and mark the holes as indicated in the figure. Remove the squares and drill holes with ¯ 2 mm at 8 mm from the outer edge of the door. Place the small square on the guide again and fix it with the screws supplied.
8mm
C D
50mm
PR266
6. Place guide (A) on the inside part of the furniture door, up and down as shown in the figure and mark the position of external holes. After having drilled holes, fix the guide with the screws supplied.
A B
PR167
A
9. Should the lining up of the furniture door be necessary, use the clearance of slots. At the end of operations, it is necessary to check if the door of the furniture closes properly.
20mm
PR166
7. Fix cover (C) on guide (A) until it clips into place.
PR168
A 10. Fix cover (D) on guide (B) until it clips into place.
C
PR 3 3/ 2
B
D
PR167/1
24
|
|
|
> |
|